Posts

Showing posts from July, 2018

"Sushi" for Breakfast?

Image
Here is a neat recipe for breakfast "sushi".  This is fairly healthy, and a lot of fun.  All the food groups are represented (peanut butter provides protein).  You can have this for breakfast, lunch or as a desert. There is no fish in this sushi.  To make a "sushi" roll, peel a banana, smear it in creamy peanut butter, roll it in Rice Krispies, and cut it into short pieces. To make nigiri style "sushi", cut your banana at an angle to make the "fish".  Then take a glob of peanut butter (about 1 Tbsp) and roll it around in Rice Krispies.  Pat it into a brick shape and put the banana slice on top. For "wasabi" use key lime pie flavor yogurt. For the "ginger", use a vegetable peeler to make thin slices of carrot.  Then cut the slices into pieces about 1.5" long.  Make a little pile on the plate.  You can use these to "cleanse the palate" between pieces of "sushi". If serving this as a dese...

Bleeding Control Trainer

Image
This is a device that can be used for Scouts to practice treatments for severe bleeding.  It can be used to practice tourniquet application and packing of wounds with hemostatic gauze.  Currently, tourniquet use is de-emphasized and hemostatic gauze use is absent from the Scout curriculum.  This runs counter to national trends, like the Stop the Bleed campaign being promoted by the American College of Surgeons Committee on Trauma, that is teaching hemorrhage control techniques to lay people.  Bleeding control kits that contain tourniquets and hemostatic gauze are being placed in or near AED cabinets in public locations around the nation as part of this program.  This is the current standard for layperson first aid, and the BSA will eventually catch up. Side view. Top view. End view. With tourniquet and pressure dressing. Bleeding control training devices that are commercially made can cost anyway from a few hundred to a few thousand dollar...

Camping Pot

Image
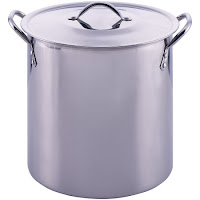
Remember the Trail Chef Cook Kit that the BSA used to sell?  The best thing in the kit was the big pot.  They don't sell it anymore, and it's a shame.  I set out to replicate the big pot and here is what I came up with.  I wanted something inexpensive and lightweight that fits in a pack or over the end of a sleeping bag and has a bail that can be used to hang the pot over a fire. The bail had to be able to stand up on its own so it doesn't get hot.  Start with an  inexpensive stainless steel stock pot.  You can get a 12 quart stock pot from Walmart for $6.71. You will also need an aluminum sign holder like this one.  $1.28 at Lowes. First cut the handles of the pot and grind them as flush as possible.  Don't leave any sharp edges.  I used a Dremel tool with a cut off wheel and a sanding drum. Next drill a 1/8" hole centered between the handle stumps 3/4" down from the top.  Directly above that use a small round...

Dining Fly Poles

Image
Here is how to make some inexpensive poles for a dining fly.  Make two of these, add an inexpensive poly tarp, some cordage and stakes and you have a very economical dining fly. Materials: 1/2" EMT pipe (10') 5/8" oak dowel 7 or 8" aluminum gutter nail (spike) EMT stands for electrical metallic tubing.  It is used as electrical conduit.  It is galvanized steel, but fairly lightweight.  You can buy a 10' foot length of 1/2" diameter pipe for $2 and change at your local home improvement store. If you want an 8' pole, cut your pipe into two 4' sections.  Cut a 2" piece of the 5/8" dowel.  Hammer into into one end of one pipe.  You may need to sand it a bit to make it fit.  You want a tight fit so it doesn't move later.  Now drill a hole through the dowel that is slightly smaller than the gutter nail diameter.  I used a 7/32" bit.  Hammer the nail in until about 2" is still protruding. Now make a piece to connect th...

Sewing Machine

Image
If you don't have one already, you should get a sewing machine.  A simple low end Singer from Walmart will do.  They run about $100 - $125.  If you are male, think of it as a power tool, which it is.  They are not that hard to figure out.  Although many machines have complex features, like button hole stitching, you really only need to know how to run a straight stitch for 99% of projects.  Maybe an occasional zigzag stitch (also not difficult) for repairs.  Once you have a sewing machine and you start using it, you will wonder how you ever got along without one.  Once you repair a few items of clothing, the machine will have paid for itself.  Besides the sewing machine itself, you will need thread in various colors (see below), extra bobbins, a heavy denim needle for patches, and some scissors. Basic Skills You need to now how to put thread on the bobbin and how to thread the machine.  You also need to know how to set the stitch ...

Mosquito Net Frame

Image
I just got back from summer camp.  I strung up my mosquito net inside my tent using some paracord.  It was tedious to set up and the result was not pretty.  So I decided to make my own frame for the mosquito net. I used the following criteria: a.  reasonably lightweight b.  fits in the trunk that I use for camp c.  reasonably inexpensive (< $20) d.  works with wood or metal frame cots e.  fits in the standard BSA wall tent (one side has to be shorter) Materials: 4 2" C clamps 2 10' sections of 1/2" CPVC pipe 2 1/2" CPVC 90 deg elbows 4 1/2" CPVC 45 deg elbows 2 20' sections of paracord Cut List for CPVC Pipe: 34" (2) 26.5" (2) 18" (2) 1.5" (2) I got 4 2" C clamps from Harbor Freight for $2.19 a piece.  I used a bench grinder to grind down one end of each handle so they could be removed, thus allowing a piece of pipe to fit over the threaded part.  I duct taped the handles to the clamps so they would not get l...

Sewing Kit

Image
A good sewing kit is a must for field repairs of clothing or gear.  Here is how to make a useful, lightweight, compact, inexpensive kit of your own. Get a plastic wallet card, like an expended gift card.  Put some round notches in the sides like in the image.  I used a dremel tool with a grinding stone, but you could use a round file, or a piece of sandpaper wrapped around a dowel or other cylindrical object. On the flats between the notches, on one side of the card, use a sharp thin knife to cut slits.  Be careful!  You will have to look closely at the image to see these.  The slits will be used to secure the ends of the thread.  I loaded mine with olive thread (scout pants), khaki (scout shirt) and black (general purpose).  Wrap a rubber band around one set of notches and use this to secure some small safety pins.  Another freebee you can get from a 5k or other race.  Safety pins are useful for quick temporary repairs of rips...