Posts

Showing posts from January, 2021

Stroganoff - Backpacking

Image
Here is a recipe for beef stroganoff that you can use on the trail that is tasty, lightweight and calorically dense.   Ingredients beef stroganoff mix* 1 lb ground beef 1/3 cup powdered milk 8 oz package of mushrooms (optional) *Hamburger Helper brand works for this, but I used a similar product from Aldi. Beef stroganoff kit with pasta, flavor packet and cheese sauce. Before you hit the trail, you will need to dehydrate the ground beef and mushrooms.  Cook the ground beef in a skillet and break it into small pieces.  When thoroughly cooked, drain off the excess liquid and use paper towels to soak up any excess moisture.  Cover a baking sheet with parchment paper and place the ground beef on top.  Spread it out as evenly as possible.  Place in an oven on the lowest setting, around 170 degrees.   It takes about 8-12 hours to dehydrate the beef.  When dry, place into a 1 qt resealable freezer bag.  You can dehydrate the mushrooms in s...
C Bags

Image
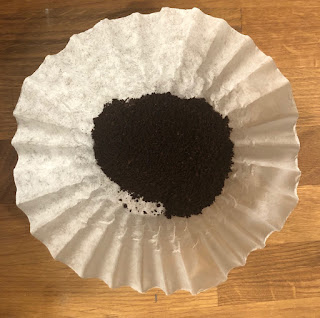
 This is my take on the teabag but with a "C" for coffee.   Take an 8-12 cup size basket filter and add enough coffee for one cup.  I like my coffee strong and I have a large cup, so I used 2 Tbsp of coffee. Then gather up the edges so that you coffee is contained in a little pouch.  Use dental floss to tie it.  I used a round turn with a surgeon's knot.  Then I tied an overhand knot in the end of the tails, so I could use a larks head knot to secure the bag to a spoon.   This bag wanted to float, so I had to use the spoon to push down on it rather than pull up on it.  

Improvised Splints

Image
 This post is about improvised splints that you can make with some camping equipment you probably already have.  You could carry a Sam splint with you into the backcountry, but you can make a splint that is just as good or better with stuff you already have.  A lot of Scouts have the ubiquitous blue closed cell foam sleeping pad.  You can fashion these into splints.  Unless you are splinting an entire leg, you are probably going to have to cut the foam.  Consider that these mats cost a few bucks less than a SAM splint.  Although the SAM splint is reusable, once you send somebody to the hospital with your SAM splint, you will probably never see that splint again.  Just sacrifice the mat, and buy a new one later.   Below are splints for the forearm and lower leg made from a cut closed cell foam pad. Splints can be secured with a variety of items.  Neckerchiefs, bandanas, belts, sleeping bag straps or duct tape.  If you have a bel...

IFAK

Image
 IFAK stands for Individual First Aid Kit.  I did a previous post on assembling a first aid kit here .  That was for the standard Scout first aid kit that is required for Tenderfoot rank and should be carried on all Scout outings.  Although that kit has a few items in it that would come in handy in a real emergency, it is primarily a "boo-boo" kit for minor cuts and scrapes and such.  The IFAK I want to talk about is designed for serious emergencies or "hurry cases" in Scout lingo.  This is something to keep on or near you at all times, not just for Scout activities.  If you are a student, keep it in your backpack.  Public access bleeding control kits are a thing now.  They are typically co-located with AED's.  Familiarize yourself with the location of these at your school or workplace. A good IFAK should allow you to do the following things:  1.  protect yourself (gloves / CPR mask)  2.  apply a tourniquet  3....

Jambalaya - Backpacking

Image
This is an easy one pot recipe for jambalaya that you can use on the trail.  I bought all the ingredients at Aldi.  This serves 3 people. Ingredients 1 8 oz package jambalaya mix 1 16 oz package summer sausage (sliced and quartered) Directions  Saute the summer sausage in the pot.  Add 2.5 cups of water (or whatever amount your mix directions say) and bring to a boil.  Add jambalaya mix, stir and bring back to a boil.  Reduce heat, put the lid on the pot, and simmer for 5 min.  Stir again and put in the pot cozy .  (See previous post for how to make one.)  Let sit for 25 min.  Serve. The original directions for this say to simmer for 25 min.  That would burn a lot of backpacking stove fuel.  This recipe takes full advantage of the insulating properties of the Reflectix material in the pot cozy.  I was a little worried about taking a hot pot of of the stove and putting it into the cozy.  I cut 4 circles of aluminum foi...

Moroccan Chicken - Backpacking

Image
In this post we are going to take the Moroccan chicken recipe from my previous post and modify it for backpacking.  The main modification I'm going to make is dehydrating the chicken.  A 12.5 oz can of chicken weighs about 15 oz.  After you drain the water out, the remaining chicken weighs about 7.5 oz.  After you dehydrate it, it weighs about 2.5 oz.  That is a difference of 12.5 oz.  For 2 cans, we are talking about a 1.5 pound weight savings.   A food dehydrator is ideal for this task, but it can be done in a regular oven.  Most ovens will only go as low as 170 degrees.  165 is the ideal temperature for dehydrating meat.  Close enough.  Put a cookie cooling rack on top of a baking sheet and then put parchment paper on top of the cookie cooling rack.  Use canned cooked chicken and cut it into small pieces.  Large pieces can "case harden" which is where the outside looks nice and dry, but it is still wet inside....

Moroccan Chicken

Image
 Here is an super easy tasty one pot recipe for Moroccan chicken for camping.  This is for 3-4 people.  Everything I used came from Aldi, except the ras el hanout, which was from Target. Ingredients 2 5.8 oz boxes of couscous mix 4 tsp extra virgin olive oil 2 12.5 oz cans of cooked chicken (drained) 6 oz package dried apricots (chopped) 2 1 oz packages of raisins 1/2 cup sliced almonds 2.5 Tbsp ras el hanout  2 tsp lemon juice Directions Put all the ingredients in a pot including the seasoning that comes with the couscous.  Add however much boiling water your couscous mix calls for.  In my case is was 2.5 cups for 2 packages.  Mix everything up well, cover the pot, and let it sit for 5-10 minutes.  Serve. Ras el hanout is a Moroccan spice mix.  You may have to look around to find it, but I was able to get it from Target.  It is easier to cut the dried apricots up with scissors than to chop them.  I will do a future post on how to m...